Weekend Bathroom DIY Projects: 7 Easy Upgrades to Transform Your Space

Introduction
Whether you're preparing your home for guests, refreshing an outdated bathroom, or simply looking for a productive project, small changes can make a noticeable difference.
A bathroom does not always need a complete renovation to feel more considered. Replacing a few tired details, adding practical storage or introducing a new colour can change the room’s atmosphere in a relatively short time.
Before beginning, make a simple plan. Decide which areas need the most attention, gather the right tools and allow time for surfaces to dry properly. It is often better to complete two projects well than rush through seven.
Here are seven easy weekend bathroom DIY projects to try.

1. Replace Cabinet Handles and Knobs
An easy and effective way to make an instant upgrade!
One of the quickest ways to modernise a bathroom is to replace old cabinet handles and drawer knobs. Vanity units often take up a large part of the room, so even a small hardware update can have a strong visual effect.
Start by removing the existing handles and measuring the distance between the screw holes. This measurement is known as the centre-to-centre distance. It is important to choose replacement drawer pulls with the same spacing if you want to use the existing holes.
For cabinet doors or drawers with a single hole, a cabinet knob is a simple choice. If the vanity has two holes, consider a pull handle in a suitable size and shape.
Popular bathroom hardware finishes include:
- Matte black
- Brushed brass
- Polished brass
- Satin nickel
- Chrome
- Antique brass
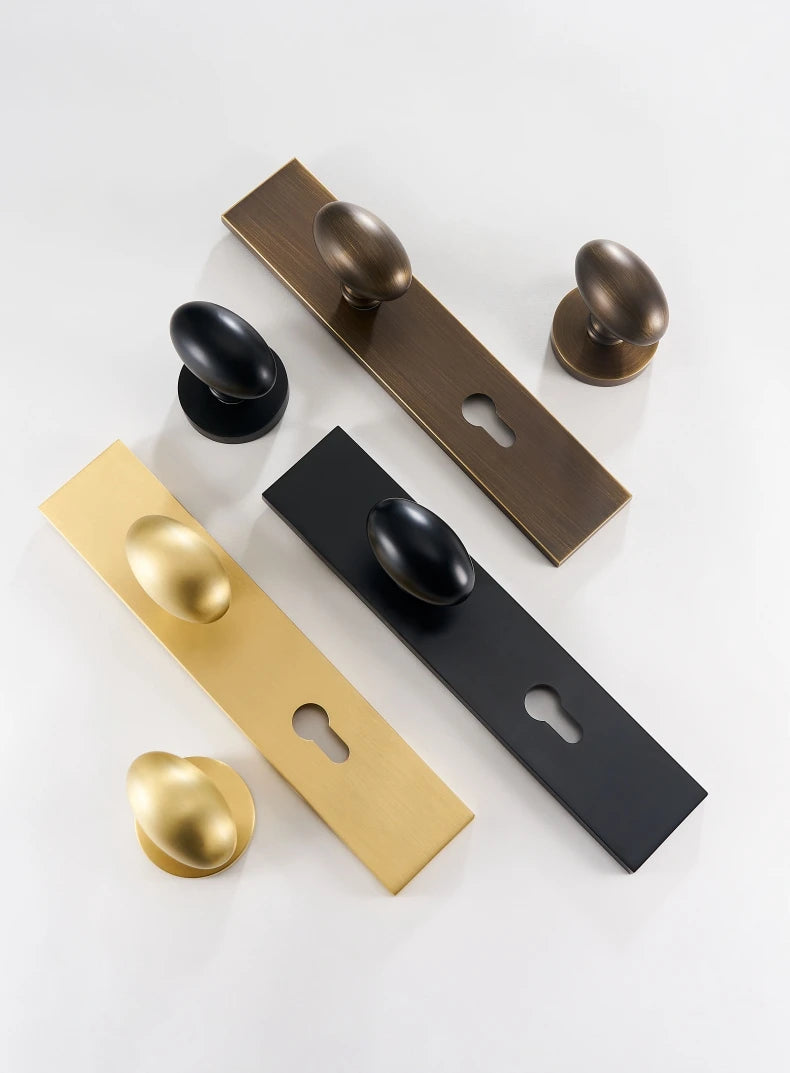
Brushed brass cabinet knobs bring warmth to white, cream or pale grey cabinetry. Matte black creates a stronger contrast and works well in modern or monochrome bathrooms. Chrome and satin nickel offer a cooler, understated look.
Solid brass is strong and durable, making it a considered choice for frequently used cabinetry. However, bathroom hardware should still be kept dry where possible and cleaned according to the finish instructions. Use a screwdriver rather than a drill when fitting handles, and avoid overtightening the screws.
Some of our best selling handles:


"The kitchen hasn't been done yet so the handles are not yet fitted but the handles are really lovely, stylish, good quality and will look amazing when fitted." - Jill M
2. Update Your Bathroom Mirror
A mirror is one of the first things people notice when they enter a bathroom. It also reflects light, so changing its shape or position can make the whole room feel different.
If your current mirror is a plain rectangular design, consider replacing it with a round or softly curved style. Rounded mirrors can soften bathrooms with angular tiles, square cabinetry or strong lines. A narrow arched mirror can also add height above a vanity.
An LED backlit mirror is another option. It introduces a gentle layer of light and can be useful for everyday tasks. Before buying, measure the wall space carefully and check whether the mirror requires a new electrical connection. Electrical work should be completed by a qualified professional.
For a simpler weekend project, frame the existing mirror. Timber trim can create a warmer, more traditional appearance, while painted moulding offers a cleaner contemporary finish. Use an adhesive designed for mirrors and make sure the frame is properly supported while it sets.
Keep the proportions balanced. A mirror that is slightly narrower than the vanity often looks polished, while one that extends too far beyond the unit can make the wall feel crowded.

3. Paint the Walls
What to consider when it comes to door knobs and door handles
Painting is one of the most accessible bathroom DIY projects. A new colour can make the space feel cleaner, brighter or more welcoming without changing the layout.
Popular bathroom colours include:
- Warm white
- Soft beige
- Sage green
- Pale blue
- Light grey
- Taupe
Warm neutrals work particularly well with brass and bronze hardware. Sage green can create a calm, natural feel, while pale blue gives a bathroom a light and airy quality. For a smaller room, a soft white or pale grey can help reflect available light.
Preparation is the key to a good finish. Clean the walls first to remove dust, soap residue and any grease around the basin. Fill small holes, lightly sand uneven areas and protect the flooring and sanitaryware with dust sheets. Mask the edges around skirting boards, door frames and tiles.
Choose a moisture-resistant paint designed specifically for bathrooms. It should be suitable for humid rooms and help reduce the risk of peeling and mould. Allow each coat to dry fully before applying the next one, even if the surface feels dry to the touch.
If you want more visual interest, paint the vanity wall in a deeper shade while keeping the remaining walls lighter. This creates a gentle focal point without overwhelming the room.


4. Replace Your Tap
A worn or outdated tap can make an otherwise attractive bathroom feel unfinished. Replacing it is a relatively small change, but it can bring the basin area up to date immediately.
Before buying a new tap, check the type of basin and the number of tap holes. You should also check the connections beneath the basin and make sure the new tap is compatible with the existing plumbing.
Always turn off the water supply before beginning. Place a towel or small container beneath the connections to catch any remaining water. Remove the old tap carefully, clean the area around the tap hole and follow the manufacturer’s instructions when fitting the new one.
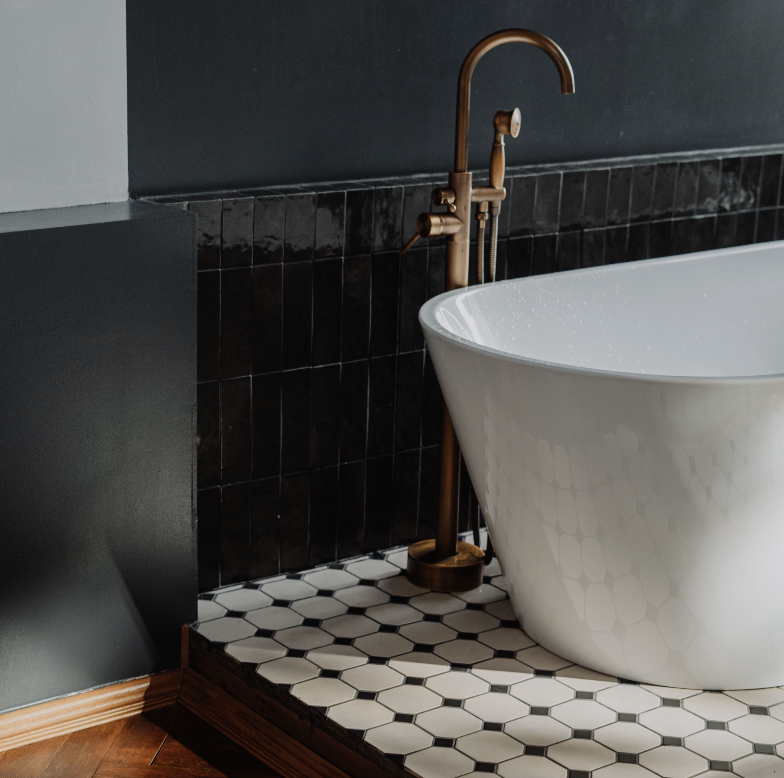
Brushed brass and antique brass taps work beautifully with warm paint colours and brass cabinet hardware. Chrome remains a dependable choice for bathrooms with white sanitaryware and cooler-toned tiles.
If the plumbing is difficult to access, the connections are corroded or you are unsure about the installation, ask a qualified plumber for help. A quick update should not create a larger problem.

5. Install Floating Shelves
Floating shelves are a practical solution when a bathroom lacks storage. Because they do not take up floor space, they can make a compact room feel less crowded while providing a useful place for towels, skincare and everyday essentials.
Install one or two shelves above the toilet, beside the vanity or on an unused section of wall. Keep shelves away from direct splashes wherever possible, particularly if they are made from timber.
Measure the wall carefully and use fixings suitable for its construction. Plasterboard, brick and tiled walls require different types of fixings. If you are drilling into tiles, use the correct bit and work slowly to avoid cracking them.
For a tidy appearance, use baskets or small containers to group loose items. Leave some open space so the shelves do not look overfilled. A folded hand towel, a simple ceramic pot and one or two well-chosen accessories can be enough.
You could also add small brass hooks beneath a shelf for flannels or dressing gowns. Repeating a finish used elsewhere in the room, such as brushed brass cabinet knobs, will help the storage feel integrated.


6. Regrout or Refresh Tile Grout
Over time, grout can become stained or discoloured. Even when the tiles themselves are in good condition, tired grout can make the entire bathroom look older.
Begin by cleaning the grout with a suitable bathroom or grout cleaner. Use a small brush to work into the joints, then rinse and dry the area thoroughly. A grout pen can provide a quick refresh where the grout is sound but has lost its original colour.
If the grout is cracked, loose or missing, it may need to be removed and replaced. Work carefully and avoid damaging the edges of the tiles. New grout should be applied evenly, then wiped from the tile surfaces before it fully dries.
Pay particular attention to corners, areas around the bath and shower, and any joints that are regularly exposed to water. Flexible bathroom-grade sealant is usually more suitable than grout for movement joints and corners.
Good ventilation is important after cleaning or regrouting. Open a window or use the extractor fan to help the area dry properly and reduce lingering moisture.

7. Add Panelling (Peel and Stick or Wooden)
Modern peel-and-stick panelling is an easy way to introduce shape and pattern. It can also be a useful renter-friendly upgrade, provided the product is suitable for the wall and can be removed without damage.
If you are more of an experienced DIY-er then you could use real wooden panels for a more traditional look - perfect for a Victorian or Georgian look. It's simple, effective and adds a point of interest to your walls without the expense of bathroom suitable wallpaper.
Check out your local B&Q, or a panelling store online, for lengths of dado/picture rail or a panelling kit. Amazon has a lot of options for peel-and-stick panel lengths.


Key Takeaways on Weekend Bathroom DIY Projects
These seven weekend bathroom DIY projects show that a beautiful bathroom does not always require a major renovation.
Replacing cabinet knobs or drawer pulls can give a vanity unit a new character. A fresh mirror can change the proportions of the room, while paint brings an immediate sense of colour and renewal. Floating shelves improve storage, and clean grout can make existing tiles look brighter.
For a cohesive result, choose a simple palette and repeat key finishes throughout the room. Brushed brass cabinet hardware, a matching bathroom door handle and warm-toned accessories can create a quiet sense of continuity.
With careful preparation, a few basic tools and a realistic plan, small improvements can transform your bathroom in a single weekend. Simple changes often make the greatest everyday difference.

Hannah
Hi, I’m Hannah! As an interior designer with a self-confessed hardware obsession, I founded The Boutique Handle Co to help homeowners and fellow designers find those perfect, high-quality finishing touches. My blogs are a mix of hardware tips and interior design guidance - combining both of my favourite things!
Elevate your space
Discover our huge range of stylish door knobs and door handles to suit every home now!
Comments