The Almost Finished Renovation Checklist: 7 Details People Forget

Introduction
After weeks or months of decorating, deliveries, dust and difficult decisions, reaching the end of a home renovation is a great feeling. The walls are painted, the flooring is down and the major furniture is finally in place.
Then you start looking around. There’s a door without a handle. The hallway still has a bare light bulb. One room has no curtains. The kitchen cabinets look lovely, but the old handles suddenly stand out for all the wrong reasons.
It’s often the last 5% that makes a home feel finished. Before you put away the toolbox, use this renovation checklist to catch those smaller jobs and finishing touches after renovation.

1. Door Handles and Cabinet Pulls
Such a simple swap will make such a difference!
Doors are often painted or replaced during a renovation, but their hardware can easily be forgotten. Old, scratched or mismatched door handles and door knobs are especially noticeable against freshly decorated rooms.
Check every internal door, including bedrooms, bathrooms, utility rooms and cupboards. Don’t forget the small doors either: a pantry, airing cupboard or closet can be used every day. Open and close each door, then test the handle and latch several times. The handle should feel secure, turn smoothly and return to its resting position without sticking. The latch should engage cleanly, without needing to pull or push the door hard.
If you’re replacing a handle, check the door’s thickness and the latch’s backset - the distance from the edge of the door to the centre of the handle spindle. These measurements help you choose a fitting that will work with the existing door and latch. If the door is newly hung or the latch needs replacing, ask your carpenter or installer to confirm the right specification.
Finish matters, too. A considered choice helps the hardware sit comfortably with nearby details. Brushed or gold hardware can bring warmth, while antique brass has a softer, more timeworn look. Chrome offers a cleaner, cooler finish. You don’t have to match every metal in a home exactly, but a consistent finish through a hallway helps it read as one scheme. Think about the hinges and door stops as well as the handles.
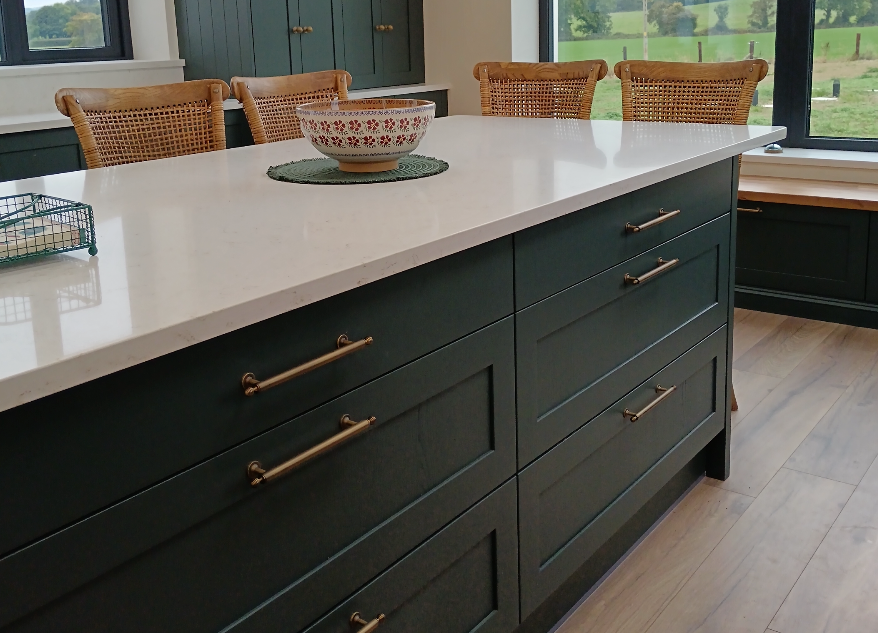
Kitchen and utility cabinetry deserves a look while you’re checking doors. If a newly finished kitchen makes the old hardware look dated, changing the cabinet handles or knobs is often the simplest visual update. For cabinet pulls, measure the distance between the centres of the existing screw holes before ordering. This centre-to-centre measurement is different from the handle’s overall length. If you’re changing from knobs to pulls, or moving to a different hole spacing, you may need to fill and refinish the old holes.
When fitting hardware, use a hand screwdriver rather than a drill. It gives more control and lowers the chance of scratching a finish or overtightening screws. Browse our door handles, cabinet knobs and cabinet pull handles to see styles for different rooms.


"Brilliant customer service! The products are such high quality and just what we wanted. We have has so many compliments about them!"
2. Light Switches and Sockets
You can spend a long time choosing wall colours (or colors) only to put an old, yellowed plastic switch back on top. Switches and sockets are small, but because they appear throughout the home, they can have a surprising effect on the finished result.
Walk through each room and look for cracked, loose, marked or noticeably mismatched plates. Check that switches are level and sit neatly against the wall. Test the lights, dimmers and two-way switches as you go, and note any that don’t work as expected.
You don’t need decorative fittings everywhere. Replacing the most worn or out-of-place ones may be enough to make a room feel cleaner and more considered. If a switch or socket is warm, buzzing, sparking or damaged, stop using it and contact a qualified electrician. Don’t remove plates or attempt electrical work yourself.

3. Skirting Boards and Door Frames
These details will give your space a really high-end look
Skirting boards (baseboards) and door frames often take a few knocks during renovation work. Once the furniture is back in place, it’s easy to miss the little chips, filler marks, gaps or areas that never received a final coat of paint.
Look along the edges of each room in good light. Check corners and joins, the places where skirting meets the floor, and the architrave around doors. A small paint chip may need only a careful touch-up. A gap may need filling before it’s repainted. If a board is loose, or a crack keeps returning, add it to your home renovation snagging list for the relevant tradesperson rather than covering it over without checking the cause.
Taking a moment to clean dust from the edges can help you see the finish clearly. Make a note of the paint colour and sheen used in each room so future touch-ups are easier.


4. Silicone and Sealant
Next on this renovation checklist: check the bathrooms and kitchen. These rooms can look almost finished before the final sealant has been applied.
Inspect the joins around baths, showers, sinks, kitchen worktops and splashbacks. Silicone sealant should form a neat, continuous line, with no obvious gaps, peeling edges, cracks or areas where it has pulled away. (It’s sometimes mistakenly called “silicon” sealant, but the flexible product used for these joints is silicone.) A tidy finish matters, but sealant also helps keep water out of places where it can cause damage.
If the sealant looks untidy or damaged, don’t simply run a new bead over the top. Ask the installer, or a suitable professional, whether the old material needs to be removed and the surface prepared first. For new work, let sealant cure for the time stated by the manufacturer before exposing it to water.

5. Curtains and Blinds
Window coverings are sometimes pushed to the bottom of the renovation budget, particularly when more urgent jobs need attention. But a room without curtains or blinds can feel unfinished, even when the rest of it is in place.
Curtains and blinds bring softness, texture and privacy while helping to frame a window. They can also make a room feel more comfortable at different times of day. Check that the pole or track is fitted securely, the curtains hang evenly and the window can still be opened as needed. For blinds, confirm that the mechanism works smoothly and that the covering sits at the height you want.
If made-to-measure options aren’t in the budget yet, a simple temporary solution can make a room feel more complete while you decide on fabric and colour. Remember to consider how the covering will work with radiators, window handles and any furniture nearby.


6. Light Fittings
Temporary bare bulbs have a habit of becoming permanent. After months of renovation, you may have stopped noticing them altogether.
Walk through the house and check ceilings, walls and lamps. Make a list of missing shades, unfinished pendant fittings and bulbs that need replacing. Think about what each room is used for: a reading corner may need a focused lamp, while a hallway benefits from comfortable, even light. Where a fitting has a dimmer, make sure the bulb is suitable for it.
Installing the final light fittings can make rooms feel more intentional, but safety comes first. If a fitting needs wiring or you’re uncertain about the installation, use a qualified electrician. Once everything is fitted, test each light and switch, including those operated from more than one point.

7. Bathroom Hardware
And finally on this renovation checklist, look at the bathroom hardware. Bathrooms involve so many major decisions that smaller accessories are often left until the end. Check whether you still need towel rails, robe hooks, toilet roll holders, mirrors or new cabinet handles.
It helps to decide where each item will be used before drilling. A robe hook should be easy to reach when stepping out of the shower. A towel rail should sit where a towel can dry without blocking a door or catching on a radiator. Check that the toilet roll holder is comfortable to reach from the loo, and that vanity knobs are easy to grip with damp hands.
Before fixing anything to a wall, check what’s behind it. Pipes and electrical cables may run through the area, especially around showers, basins and heated towel rails. If you’re unsure, ask your installer to confirm a safe position. Use fixings suitable for the wall type and the weight of the item, particularly for a mirror or a long towel rail.
Finish coordination can make a compact bathroom feel calmer. Consider how the accessories sit with the tap, shower fittings and cabinet hardware. They don’t have to be identical, but choosing finishes that work together helps the details feel deliberate. If you’re replacing vanity knobs, check the existing hole spacing and the thickness of the cabinet front before ordering.


8. A Walk-Through Snagging Routine
Rather than trying to remember everything, take a notebook and walk through the home room by room. Start in daylight, when natural light makes paint marks, uneven finishes and dust easier to see. Look at walls and woodwork from more than one angle.
Write down each job with its location and a brief description: “loose handle, upstairs bathroom” is more useful than “fix bathroom”. Take a photo if it will help you explain the issue to a tradesperson. Keep safety or water concerns at the top of the list.
Then do a second pass after dark. This makes it easier to spot bare bulbs, dim corners, lights that don’t work and switches that are difficult to find. Test doors, handles and lights as you go. If a contractor is still responsible for work, share a clear list and agree who will address each item.

9. Have You Got Spares?
Set aside a small box for future touch-ups. Keep spare screws, a couple of spare handles if you have them, touch-up paint labelled with the room and finish, spare bulbs, and any suitable leftover sealant within its usable date.
Store cabinet hardware carefully, especially if you might need to replace a damaged piece later. Keep the original packaging or note the product name, finish and measurements. These small records can save time if you need to match a fitting in the future.
10. What to Do If It Still Doesn’t Feel Finished
If you’ve worked through the list and the home still feels slightly incomplete, pause before buying more. Spend a few days using the rooms and notice what’s missing in practice. It may be a lamp beside a chair, a mirror in the hallway or a place to hang coats.
Look at the home as a whole, too. Repeated details, such as a consistent metal finish or a considered lighting choice, can help different rooms feel connected. If there are unfinished jobs that affect safe use, water protection or the operation of doors and windows, ask the appropriate professional to review them rather than treating them as decoration.

Final Thoughts on The “Almost Finished” Renovation Checklist: 7 Details People Forget
The biggest renovation jobs tend to receive the most attention, but they’re not always what makes a home feel finished. Often, it’s the combination of smaller details: straight cabinet handles, properly fitted door knobs and door handles, neat sealant, working lights and those final paint touch-ups.
When you think the renovation is finished, give yourself one final look at this renovation checklist, then enjoy your home. If you’re still choosing hardware, you’re welcome to browse our collections for ideas. Interior designers, carpenters and architects can also find details about our Trade Programme.

Hannah
Hi, I’m Hannah! As an interior designer with a self-confessed hardware obsession, I founded The Boutique Handle Co to help homeowners and fellow designers find those perfect, high-quality finishing touches. My blogs are a mix of hardware tips and interior design guidance - combining both of my favourite things!
Elevate your space
Discover our huge range of stylish door knobs and door handles to suit every home now!

Comments